
12 Incredible Night Photography Tips
Use a Sturdy Tripod
During night photography, it’s necessary to have a longer exposure time than during the day, so even one hit of your hand can make your picture out of focus. A good tripod makes all the difference in the world when trying to hold your camera steady, at night or when you are shooting a cityscape, stars or even low-light nature photography.
Shoot in Manual Mode
Auto mode can tend to struggle in low light, and photos are often underexposed. If you don’t know how to deal with manual mode your damn self, pshh. This control lets you preserve the perfect brightness and detail balance for night time scenes.
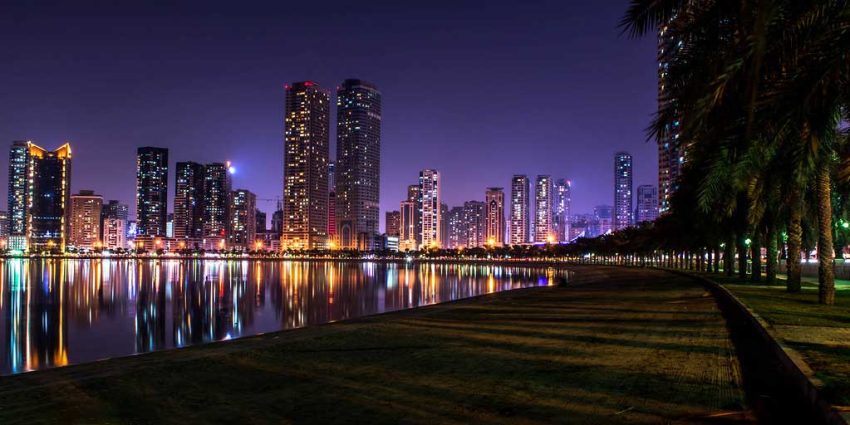
Experiment with Long Exposure
Long exposure makes motion turn into magical visual effects such as misty water, star trails, or light streaks created by passing cars. Expose the sensor for a few seconds or minutes, so more light enters it to produce dramatic and stylistic nighttime photographs.
Keep ISO as Low as Possible
It may be tempting to bump the ISO in order to make your shots brighter, but that will produce noise that takes away from clarity. Start at the lowest ISO possible usually 100 or maybe 200 and move up only if you have to. That can keep photos clean and high quality.
Sometimes Step into a Wider Aperture
A wide aperture like f/2.8 or f/4 can let in more light, particularly helpful for handheld shots or nighttime portraits. But for subjects and scenes that need a deeper focus, switch to a smaller aperture and use a tripod for long exposure.
Switch to Manual Focus
Autofocus can have a hard time in low light: constantly seeking focus, never finding it. For that, you can’t beat the full control of manual focus. Zoom in on a bright spot or distant light outside with your camera’s live view to fine-tune sharpness.
Use Remote Shutter or Self-Timer
Depressing the shutter button itself can lead to a minute vibration which could add blur in long-exposure shots. Disable shake with a simple remote shutter release or the 2 10 second timer built into the camera for clear, blur-free shots every time.
Shoot in RAW Format
RAW contains more details and is better for editing. As with day footage, you sometimes get shadows, highlights and mixed lighting in night scenes – by shooting RAW you can fix exposure issues in post, plus sort out any colour problems & white balance without degrading the overall image.
Pay Attention to White Balance
Nocturnal light ranges from moonlight to tungsten bulbs, neon signs to street lights and these emit different colour temperatures. White balance can be adjusted to keep colours looking natural and limit undesired colour casts, or fixed in post prior to RAW editing.
Use Natural Light Wherever You Can
Simply look for lights like streetlights, car headlights, buildings malls, and shop signs. The lights add mood and can serve as strong compositional tools. Nevertheless, watch for lens flare and if strong reflections do show up, then change your position.
Scout Locations in Advance
When you know where to put your shot, then it is easier. Going there before enables you to pick out good angles as well as lighting and foreground elements. Scouting is a time saver and prevents you from stumbling around in the dark trying to find compositions.
Get Creative With Light Techniques
Night photography encourages creative experimentation. Creative techniques such as light painting, sparkler motions, star trails or reflections on wet surfaces provide an artistic flair. At night, creativity has no boundaries, and testing new shots will push you to develop a unique style.
Leave a Reply